Written by Dave Lieberman
Why are some people better home cooks than others? Some of it is an innate gift, the same way some people are great at construction or music or athletics or getting the pull-cord lawn mower started on the first try. Some of it is experience, which any grandmother can tell you is acquired only through a lifetime of trial and error.
Some of it, though, is just learning. There are tips and tricks that experienced, good home cooks don’t even think about but which yield better results, even given the same ingredients in a dish. Below are five of these tips that will improve your cooking.

elanaspantry @ flickr.com CC BY-NC-ND 2.0
Culinary liquid gold. Can’t buy it this good in a TetraPak™.
1. Make your own stock. While there are some good boxed stocks out there–Trader Joe’s has a pretty decent one–nothing beats homemade stock. Save bones from roasted meats (even rotisserie chicken bones will work, as long as the marinade wasn’t particularly strongly flavored) and put them in the freezer. You can use them straight out of the freezer, no defrosting required.
Make the stock on a day when you’ll be home, so that you can keep the flame on the barest simmer (this makes the clearest stock). As you start, you’ll need to skim the protein-laden fluff that floats to the top, and you’ll need to add water now and then to keep the bones submerged, but it’s otherwise a fairly low-maintenance thing to make. Freeze the stock in manageable portions and you’ll have a base that will transport your soups and gravies to a new level.
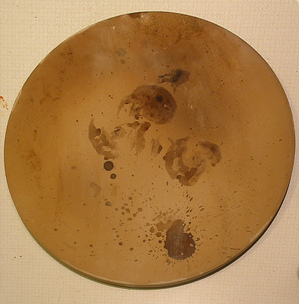
neven @ flickr.com CC BY-NC-SA 2.0
The stains give it character.
2. Put a quarry tile in your oven. Your oven is lying to you. It says it’s preheated to 400°F, but there might be a leak in the seal or a misfiring gas jet, and all of a sudden it’s actually 380°F or even 350°F in there, your food isn’t done when you think it should be, and dinner is late or ruined. Even if it’s brand new and perfectly calibrated (lucky you!), all ovens have something called “oven swing”. Ovens don’t run all the time, so the setting of 400°F is actually the average of a range between (if you’re lucky) 390°F and 410°F. If you’re unlucky, it could be as much as thirty degrees on either side.
Adding weight to your oven is the answer. While it will extend your preheat time (from 15 minutes to about 25 minutes is probably sufficient unless you’re actually baking directly on the tile), adding an unglazed quarry tile to your oven will reduce swing significantly and provide a source of pretty constant heat to the oven. You can leave it in the oven all the time. If you take it out to clean it, though, make sure you let it sit outside the oven to dry fully (a day or two) before putting it back in, or it may crack. Baking directly on the tile will result in crispy-bottomed pizzas and much better bread.
Alton Brown is right, incidentally; you don’t need a $30 pizza stone (though if you have one, use it), you can buy an unglazed quarry tile at Home Depot or Lowe’s.
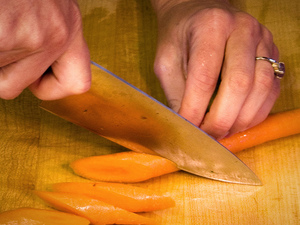
jaxxon @ flickr.com CC BY-NC-ND 2.0
Don’t believe it? Try carrots cut on the bias vs. coins.
3. Cut on the bias. The first thing chefs know that bad cooks don’t is how to hold a knife (hint: don’t point your finger along the back of the knife), and the second is that cutting on the bias changes your food in dramatic ways. Cutting on the bias means cutting diagonally. When applied to vegetables, it increases the amount of surface area and can result in quicker cooking. In the case of fruit with tough peels such as apples, it means that you won’t have a chewy piece of skin completely surrounding the flesh.
In addition, cutting grilled or roast meats (for example, roast pork or London broil) on the bias ensures that you cut across the grain and end up with a more tender bite. If you cut along the grain, the meat will be stringy and tougher, even if it’s a tender cut such as filet mignon.
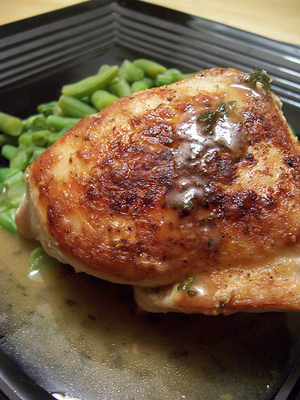
shastamacnasty @ flickr.com CC BY-NC-ND 2.0
Juicy chicken pec starts with bones and skin.
4. Buy bone-in, skin-on chicken breasts. It’s a fact of life that the chicken breast is the most popular seller at the meat counter. It doesn’t have a lot of flavor by itself (it does not, in fact, taste like chicken), but buying it boneless and skinless removes the best chance it has to redeem itself. Those pictures on television of chicken oozing clear juice as it’s sliced (on the bias, of course) are easily done at home. Roasting chicken breast on the bone results in much, much juicier chicken, and leaving the skin on renders the subcutaneous fat down onto the chicken, keeping it moist while protecting it from the heat.
To roast the chicken, preheat the oven to 375°F. Rub the top of a half breast–one “lobe”–with a tiny bit of oil; a quarter of a teaspoon is plenty. If you want crispy chicken skin, called gribenes in Yiddish and an essential component of chopped liver, loosen (but don’t remove) the skinand rub another quarter of a teaspoon of oil directly on the meat. Salt and pepper the chicken, then place it on a dry roasting pan and put it in the oven for about half an hour, until the chicken is done (when pierced, the juices will run clear, not red). Let it sit outside the oven for just five minutes, then slice it off the bone, which is easy to do.
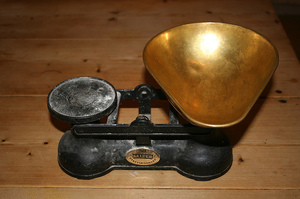
ndrwfgg @ flickr.com CC BY 2.0
Feel free to use a more modern model…
5. Learn to weigh ingredients. A cup of flour today is not the same as a cup of flour tomorrow. If you’re scooping out of a bag that’s been knocking around your trunk on the way home from the market, it will weigh significantly less than if you scoop out of a bag that’s been sitting in your cabinet for a week. If you scoop and level, it will weigh significantly more than if you spoon the flour into the cup. The reason is that flour, unlike white sugar, can be compacted. Today’s perfect, ethereal buttermilk biscuit recipe may result in leaden, biscuit-shaped anvils tomorrow, thanks to flour’s tendency to settle in its package. The solution is to weigh it. A digital scale can be a big help here, but even a manual, spring-type scale is better than trusting to measuring cups.
You’ll need to do some research for your recipes. Measure like you normally do, then weigh the flour. Don’t forget to tare (remove the weight of the bowl by putting the bowl on the scale and resetting to zero). If the end result comes out like you like it, you’ll know how much flour to use the next time and you’ll have a much more consistent product. Other things that should be weighed include cornstarch in large quantities, cornmeal (the grind size can affect your weight), butter (those tablespoons on the wrapper are next to useless since they’re not consistently wrapped with the zero line on the end) and any large items like chocolate chips, raisins, dried cranberries, etc.
6) always use less salt than you think you will need. you can always add more later, but you can’t take any away!
7) garlic makes almost everything better. so does butter.
8) don’t overcook your vegetables.
9) if something is too spicy (ex., a sauce), add cream/milk/sour cream/etc — dairy… dairy cools it down.
jenainthekitchen.tumblr.com
Just a note – you can’t make stock, or at least good stock, out of cooked bones. So using the bones from roasted meats or rotisserie chicken won’t help you, you’ll need to use raw bones to make a stock that doesn’t taste like diluted chicken water.
Start the stock in COLD water (or remouillage)
Simmer the stock slowly
Skim the stock frequently
Strain the stock thoroughly
Cool the stock quickly
Store the stock properly
You will need mirepoix (celery, carrots and onions) and an herb sachet (Bay leaf, peppercorns, parsley stems and fresh thyme) So that it does not taste like “chicken water.’ Add the aromatics an hour before the chicken stock is finished.