Written by Craig Ferguson Images
More often than not, it’s the people you meet that make travel truly memorable. It’s also the photographs of people that usually get the best reaction from family and friends when you return home. So without further ado – 10 tips for better people photography.
Bonus Intro Tip – Common to all genres of photography are three things. Correct exposure, correct white balance and sharp focus. Getting these right is essential. No amount of Photoshop trickery can replace these three basic points. Ensure you’re competent in these before you learn anything else.

1.Focus Points – One is better than many.
Modern digital cameras have a number of focus points that helps the autofocus lock on to the subject. For portrait photography, having a large number of points can be more a hindrance than a help. When using all the points, the camera will make a guesstimate based on the average of all the points. Sometimes this will work well, sometimes it won’t and you’ll be left with your subject out of focus and something in the background/foreground in focus. Not what you want. Instead, select one focus point only – usually done with a dial on the camera, check your manual for how to set it. The center point is the strongest, so use that one to lock your focus on what you want, not what the camera thinks you want.
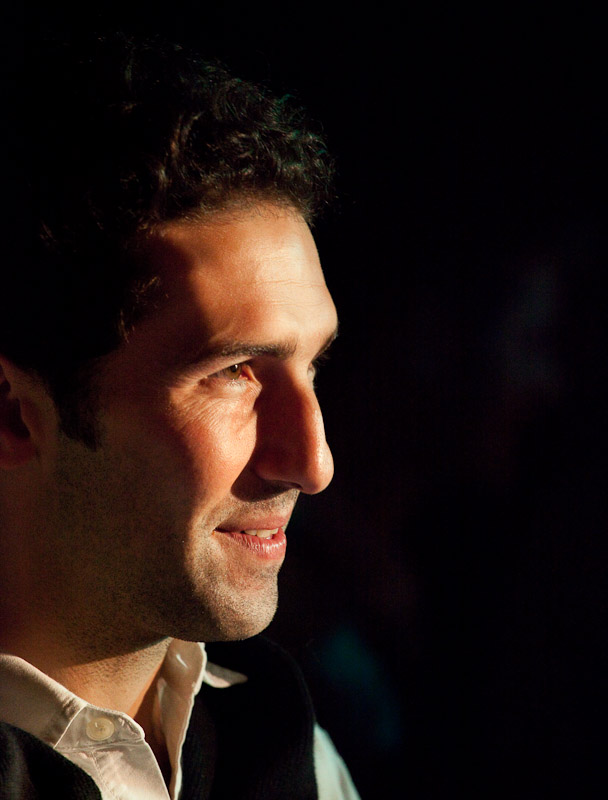
2.Focus On The Eyes
I’ve mentioned this before – the eyes are the most important part of a portrait. If they are sharp and in focus, the rest of the picture can be out of focus and it’ll still look good. Point the center focus point from 1. at the eyes, lock the focus and then recompose as necessary.
3. Shoot At Large Apertures
The aperture or f-stop is what controls the amount of light reaching the sensor. A large aperture is, sometimes confusingly, the smallest f-number. F2.8 is a larger f-stop than f16. It lets more light in, and has a shallower depth-of-field. When we set the aperture to its widest (eg f2.8), it’s known as shooting wide open. It gives a pleasing out-of-focus effect (bokeh) in the background away from the critical point, which results in pleasing portraits. The viewers’ eye is directed to the subject not the background.

4. Shoot At 70mm or Longer
At shorter focal lengths than 70mm, distortion starts to occur. It’s not really noticeable until you are below 50mm so you have a bit of leeway. If you shoot a frame-filling portrait with a wide-angle lens, your subject’s head is going to look strangely large due to the distortion. The classic portrait lengths are between 80mm and 135mm but anything from 70mm to 200mm will look good.
5. Shoot RAW
There’s really no point buying a DSLR or high-end digicam if you then go and do all your shooting in JPG. Shooting in RAW captures all the image data. Shooting in JPG means you are throwing away all but the basic data. If you make any kind of error while shooting, you can often still get usable images out of a RAW file. If you try and edit a JPG, you’ll just make things worse. If your white balance is off (or you want to creatively change it), you can with RAW. You can’t with JPG. A RAW file will be 12 or 14 bit. JPG is 8 bit. And so on.
6. Shoot In The Shade
The last place you want to be shooting is in direct sunlight. It’s harsh, it creates hard, directional shadows and it’s not at all flattering to your subject. Move into the shade and you’ll get smooth, even shadows and softer light.

7. Cloudy Days Are Your Best Friend
Professional studio photography spend hundreds and thousands of dollars on softboxes, umbrellas and other light modifiers in an effort to create soft, even light. Nature also provides soft light and best of all, it’s free. Cloudy, overcast days are the people photographers best friend. Cloud cover can help enrich the colors and create smooth, flattering shadows.
8. Learn Sunny 16
Sunny 16 is a rule of thumb for determining exposure. It’ll give you a baseline to work with. Sunny 16 simply says that on a sunny day, with your aperture value set to ƒ16, your shutter speed will be the inverse of the current ISO speed. For example, if your camera is set to ISO 100, and your aperture value is ƒ16, your shutter speed will be 1/100th of a second. On a cloudy day (or when in the shade) you simply use ƒ8 instead.
9. Watch Your Background
Pay attention to what’s going on around the edges of the frame. The last thing you want is trees or power poles appearing to grow out of your subjects head, or power lines coming from their ears. The internet is full of funny picture websites that show people in the background making funny faces, mooning or giving the finger behind the subject. Don’t let your photo turn into something like that.
10. Never, Ever Use On-Camera Flash
Probably the worst possible thing you can do when taking a photo of a person (or anything for that matter) is to use on-camera flash. This can not be repeated enough. National Geographic photographer Joe McNally says it best, “Straight flash is disaster light. Use it at 3:00am, with bodies on the highway and nothing to bounce off”. It is the most unflattering light – you are literally throwing light at the subject and instead of making a photograph, you’re making a copy. Doing something as simple as holding the flash at arms length in your left hand while holding the camera in your right hand can make all the difference.
So there we have it. Ten simple tips for improving your people shots while you are traveling. Get out there and give these tips a go and you’ll see a marked improvement in your pictures in no time at all. Happy shooting.
If you enjoyed this post, why don’t you subscribe to my RSS feed so that you don’t miss anything. Feel free to share this with your friends and social media networks.
These are awesome tips, thanks!
I think its important to capture expression and not use solely posed subjects.
Thanks a lot for sharing…
good tips. thanks